Bring the magic of the ocean to life and learn about one of the ocean’s calmest travellers.
Category: Saltwater animals
You’ll Need:
2 paper plates
Green and yellow markers or paint
Googly eye
Scissors
Glue stick
Let’s Make it:
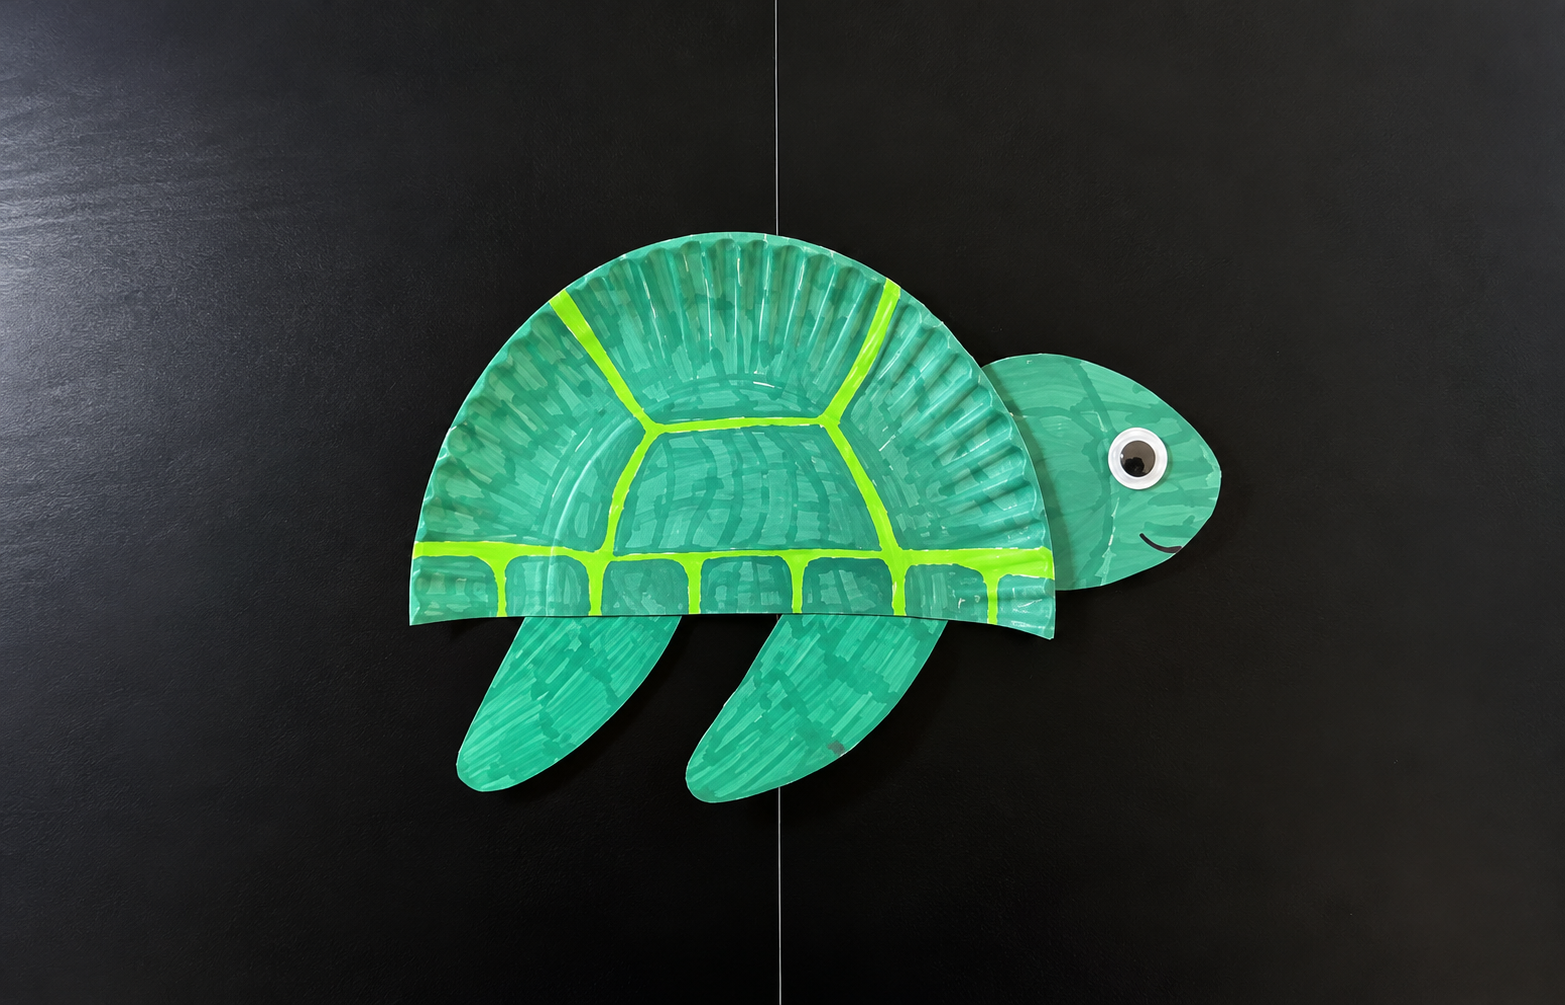
Fold one paper plate in half and cut along the fold to make the turtle’s shell. Use green and yellow markers to draw shell patterns to make your turtle shell look realistic and fun.
From the second paper plate cut out one oval for the head and two flipper shapes. Color them green to match your turtle’s body.
Assemble and Decorate: Glue the head behind the right side of the shell and attach the two flippers behind the bottom edge, angled slightly outward. Add one googly eye on the head and draw a small curved smile. Let everything dry completely—your turtle is ready
Did You Know?
Baby sea turtles use the moonlight to find their way to the ocean right after they hatch.
Some sea turtles travel thousands of miles across the ocean every year to lay eggs where they were born.
They can live over 100 years — that’s as old as some great-grandparents.
Their favorite resting spots are under coral reefs or in sandy ocean floors where they can nap safely.
Sea turtles can hold their breath for up to five hours underwater when they rest.
Their shells are part of their skeletons, made of over 50 bones fused together.
A turtle’s shell has nerve endings, so they can actually feel when you touch it.
Why We Love It:
It turns simple paper plates into a beautiful ocean friend that’s full of character and charm.
Encourages creativity while introducing kids to the amazing world of sea life.
Offers a fun way to talk about shapes and patterns when designing the turtle’s shell.
Promotes focus and patience as kids carefully build and decorate each part.